
Featured Artist Profile on Renderosity Magazine
Featured Artist Profile on Renderosity Magazine by Ricky Grove.

I came across John Teeter’s (JT2XTREME) artwork when I was looking for a Gallery of the Week selection for Renderosity. His outstanding Elvis King image caught my imagination and I sent him an email. We chatted a bit about his work and he sent me 12 images he thought were representative of his work. They sure are!
One thing I particularly like about John’s work is the combination of energy (like a Hell’s Angel member) combined with careful attention to detail (like color and framing). The boldness of his work and the wide variety of subjects is what makes him such an excellent and exciting artist. There’s a hint of Frazetta in his work, but John doesn’t imitate the master – he uses the Frazetta style as a starting point and warps into his own way of creating images.
Make sure you watch the video (below) to see the kind of work he does. Also visit his gallery at Renderosity.com where there are dozens more bold, passionate images.
Interview with John Teeter ( JT2XTREME)
Renderosity Magazine: Why don’t we start with talking about your Elvis pix. How did it come about? What were you trying to accomplish? What tools did you use to create the image?
JT2XTREME: There’s actually a funny story about how the Elvis image came about as I used my own likeness for the model. I had been working on my own digital character for a while in my spare time by using Daz, Zbrush, Photoshop, and Maya. My goal was to put myself in the shoes of iconic characters and fantasy scenes using some of the great content available on Renderosity and Daz. Being a big fan of Elvis I decided to become “The King” himself for my first scene. Of course no iconic scene of Elvis would be complete without the addition of a sexy female fan worshiping her idol. In the future I plan on doing a James Bond rendition, a superhero character, of course some sort of Star Trek Captain Kirk scene, and perhaps a Hitchcock suspense scenario.
Elaborate a bit more on the process of creating the Elvis image. Don’t worry about being too technical
JT2XTREME: I don’t always start a project with a particular goal in mind. Sometimes it’s nice to just sit down and start with a blank slate then see where I go. I’ll browse through some of my content and just start putting things together until I find some inspiration. Other times I will start with a purpose but it’s usually just a vague idea or concept. I find as I get deeper into a project that what I thought might look right to me doesn’t so I’ll veer off in a different direction until it works. Once I get the overall feel of an image conceptualized I’ll begin the fine tuning process with details, lighting, and depth of field if applicable. This is the fun part for me because it’s where an image really starts to stand out and become alive so to speak. I try to do as little post work as possible but inevitably there’s always something to do in Photoshop. Color correction, contrast levels, and cleaning up render anomalies with the clone and smudge tools are part of my usual post work workflow.
 In a way my Elvis self portrait is an expression of myself but mostly because I enjoy the character I’m trying to portray. I think all of us identify with certain famous characters fictional or real in some way and in this instance I thought it would be fun because Elvis is such an iconic celebrity. I recently went to Las Vegas for work and I tried to imagine what it must have been like back in the day when Elvis was the headline show. People lined up for blocks to see him preform their favorite songs and witness his stylish on stage persona must have been quite an event. If you were lucky you might have even seen him driving one of his Cadillacs into the Stardust casino to do a show.
I used Maya to model the microphone then imported it into Daz where I textured with I-ray optimized shaders. The final render took only about 15 minutes using I-ray running on a EVGA GTX 980 ti graphic card with 2816 Cuda Cores. I generally double the pixel size of what I want my final image to be then downsize it in post. I also set iterations to about 2000 which leaves some artifacts but these get cleaned up with downsizing. This process is the most efficient way to render using I-ray in my opinion. I didn’t have to do much cleanup on this render except for some color correction and contrast levels.
Can you tell me a bit about your background?
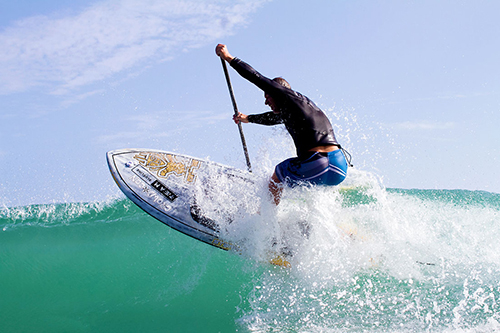
JT2XTREME: I started learning computer graphics back in 2000 in Hawaii. A mountain bike injury put me out of commission and since I couldn’t surf or ride for about 3 months I began making graphics then websites to keep myself busy. Although it was a little daunting I picked it up rather quickly. At the time Flash was just gaining popularity and I really liked the interactive aspect of using it for making websites. I guess in a way this was the beginning of my animation career as Flash worked on timeline. I then figured out that I could import videos as animated GIFs to incorporate them into my websites. This is back when there was no other way to deliver video except through streaming services. Since I needed video content I started shooting and editing video which mostly consisted of me and my friends mountain biking and surfing all over the island of Oahu. It got to a point where I wanted to add certain things to my videos that I couldn’t film so I turned to 3D. After a lot of research I decided Maya was my best choice and I began the long arduous task of teaching myself this powerful program.
 -John Teeter, super surfer
About 10 years ago I opened my own studio called Snaprender Animations based in Jupiter, Florida where I worked with many production companies on local and nationwide television commercials. I started using Daz about a year ago as a side hobby and I quickly found it was a lot of fun to sit down and start a project and finish it in less than a day. Although I love Maya for animation it takes a lot of time to complete as there’s so much involved since you’re rendering hundreds if not thousands of frames where the models have to be keyframed for every individual movement. One project can take a week or even months to complete.
I have also started a personal animation project using Daz called The Adventures of Cannabis Girl. Daz’s animation tools are almost non existent so I am using Motionbuilder for character animation then exporting the motion data back into Daz. So far this method works well and I can also use live motion capture that I make with my X-box motion sensor. I could have used Maya in my workflow for animating characters but I wanted to do a lot of clothing changes on my characters and Daz does this well so I figured I would stay within this program. I also really like the I-ray render engine so it really made sense to figure out a way to make it work. I am hoping to have the first episode complete within the next few months.
http://renderositymagazine.com/profile-of-digital-artist-john-teeter-jt2extreme—-cms-1163
 Ricky Grove is the managing editor at Renderosity.com where he produces the weekly “News of the Week” and “Gallery of the Week” video programs. When he’s not editing video or watching anime, Ricky works at the best bookstore in Los Angeles: The Iliad Bookshop. He has a life-long love of reading, movies and animation. He lives with his partner, writer Lisa Morton, and 2 eccentric cats in Southern California.


